How to Identify Accessibility Barriers Across Public Facilities
To identify accessibility barriers in a public facility, the basic process involves conducting a structured physical walkthrough, measuring key dimensions against published standards, documenting every finding with photographs, and then prioritizing corrective actions using the four-priority framework established by the Department of Justice. This guide walks you through each step in plain language.
More than 1 in 4 adults in the United States reported having a disability in 2022, according to the CDC. That is a substantial share of the public entering government offices, libraries, parks, community centers, and private businesses every single day. When so many people depend on accessible facilities, a missed barrier is a missed opportunity to serve them, and a potential legal liability.
Despite existing revised legislation on the accessibility of public buildings, people with disabilities continue to experience barriers that limit their participation and engagement in the community, according to research published in Disability and Rehabilitation. The good news is that most physical accessibility barriers are identifiable without a specialized engineering degree. With the right framework and a methodical eye, facility managers, community advocates, and building owners can spot the most common problems and start planning solutions.
Key Takeaways
- Disability is widespread and growing: The scale of disability prevalence in the U.S., nearly one in four adults, underscores why accessibility cannot be treated as a niche concern, according to CDC data analyzed by AudioEye. Treat every barrier identification effort as a core operational priority.
- The ADA applies to existing buildings: Some people think that only new construction and alterations need to be accessible and that older facilities are “grandfathered,” but that is not true, because the ADA is a civil rights law and not a building code; older facilities are often required to be accessible, per the ADA Checklists for Existing Facilities project.
- Four priorities guide your order of action: The Title III regulations recommend four priorities for barrier-removal projects: Priority 1 is an accessible entrance to the facility, Priority 2 is access to goods and services, Priority 3 is access to restrooms, and Priority 4 is any other necessary measures, per ADA-Compliance.com. Follow this sequence to maximize impact.
- Documentation is as important as the inspection itself: 68% of facilities that fail an ADA or OSHA audit cite “incomplete documentation”, not missing fixes, as the root cause, according to OxMaint’s facility compliance data. Photograph every finding on the day of your walkthrough.
- Annual re-evaluation is required: Determining what changes are readily achievable is not a one-time effort; re-evaluate access annually, because barrier removal that may be difficult now may be readily achievable later, per ADA-Compliance.com.
Quick-Start Prioritization Framework
Use this table to decide which parts of your facility to assess first and how to sequence remediation.
Area to Assess | Best Starting Point For | Effort to Survey | Time to First Fix |
|---|---|---|---|
Parking and site arrival | All facilities with on-site parking | Low | Days |
Accessible route to entrance | All facility types | Low | Days to weeks |
Entrances and doors | All facility types | Low | Weeks |
Interior circulation routes | Large or multi-story buildings | Medium | Weeks to months |
Restrooms | All facilities with public restrooms | Medium | Weeks to months |
Signage and wayfinding | Government buildings, transit hubs | Low | Days |
Service counters and amenities | Retail, healthcare, civic facilities | Medium | Weeks |
Start here if you are:
- A small business or nonprofit: Begin at the parking lot and front entrance; getting people through the door is Priority 1 and often involves low-cost fixes such as signage corrections and portable ramp placement.
- A government or civic facility: Follow the full four-priority sequence systematically, as ADA Title II program accessibility requirements apply to your services as a whole.
- Managing a large multi-use campus: Break the walkthrough into zones and complete one zone per inspection session, starting with the highest-traffic public entry points.
Step 1: Prepare Before You Walk the Property
Gather the Right Tools and Documents
A rushed walkthrough with no preparation produces a list of vague observations that are nearly impossible to act on. Preparation is where real barrier identification begins.
The first step in a comprehensive accessibility survey covers entrances, interior circulation routes, restrooms, and communication features. The tools for conducting ADA accessibility surveys may include a 25-foot tape, a digital level capable of reading 1:48 slopes, a door pressure gauge, and a 60-inch reach rod, according to the Rimkus ADA Standards for Accessible Design Guide 2026. Bring a smartphone or camera to document findings. Pull up your facility’s floor plans so you can mark problem locations directly on the drawing.
Before conducting the inspection, review existing ADA policies, previous audits, and facility layouts, as outlined by the eAuditor ADA inspection methodology. If a prior audit exists, use it as a baseline, note which items were corrected and which remain open.
Pro tip: Download the free ADA Checklist for Existing Facilities produced by the New England ADA Center. It is organized by the same four DOJ priorities covered in this guide and includes precise pass/fail criteria drawn directly from the 2010 ADA Standards. Print one copy per floor or zone.
Know Which Legal Standard Applies to Your Facility
Titles II and III of the ADA apply to different entities. Title II governs public entities such as municipalities and transit systems, while Title III applies to private businesses considered public accommodations and to commercial facilities, per the Rimkus ADA compliance guide. The practical requirements are similar, but the enforcement mechanisms differ. Knowing which title covers your facility shapes how you write up findings.
The ADA Accessibility Standards apply to places of public accommodation, commercial facilities, and state and local government facilities, including public transportation facilities, according to the U.S. Access Board. Federal facilities fall under the separate Architectural Barriers Act, which the same Access Board administers.
Step 2: Inspect the Exterior, Parking, Routes, and Entrances
This is the highest-impact zone in any accessibility inspection. A scoping review of public building accessibility found that environmental features most frequently addressed in accessibility research articles were the parking or drop-off area and the restroom or toilet (each appearing in 32 of the reviewed articles) and the entrance area (27 articles). Start outside and work your way in.
Parking and Site Arrival
Accessible parking is the first barrier most people with disabilities encounter. The 2010 Standards specify both the number of accessible spaces required and the exact dimensions for space width, access aisle width, and signage height, according to OxMaint’s ADA Accessibility Compliance guide.
When you assess the parking area, check for:
- Correct quantity of accessible spaces relative to total lot size
- Correct dimensions: 8 feet wide for car spaces, 11 feet wide for van spaces, with a 5-foot-wide access aisle for car spaces and an 8-foot-wide access aisle for van spaces, per the eAuditor ADA Checklist.
- Accessible parking spaces located closest to the building or park entrance, as required under ADA guidelines, per Accessibe.
- Proper signage mounted at the correct height
- A continuous accessible route from the spaces to the building entrance
If spaces exist but signage is incorrect, or dimensions are off, those spaces still count as barriers. An accessible parking stall that displays improper signage is considered a barrier to accessibility under ADA standards, per ProactiveAccess.
Accessible Routes and Ramps
Compliant parking spaces, restrooms, and entrances mean nothing if the path connecting them fails. Under the 2010 ADA Standards for Accessible Design, an accessible route must link all accessible building elements, spaces, and site arrival points into a continuous, navigable path for individuals using wheelchairs, walkers, crutches, or other mobility devices, according to All Things Inspector.
Check each accessible route segment for:
- A continuous, unobstructed path at least 36 inches wide with a stable, firm, and slip-resistant surface, as specified in the eAuditor ADA Checklist.
- Running slope no steeper than 1:20 for general walking surfaces, and no steeper than 1:12 for designated ramps
- Cross slope no exceeding 1:48 to prevent tipping hazards
- No abrupt changes in level greater than half an inch
Ramps must have a slope no steeper than 1:12, meaning for every inch of vertical rise, there must be 12 inches of ramp length, per the 2010 ADA Standards analyzed by Corey and Partners. If a ramp you are measuring exceeds that ratio, document it as a barrier and flag it for priority remediation.
Entrances and Doors
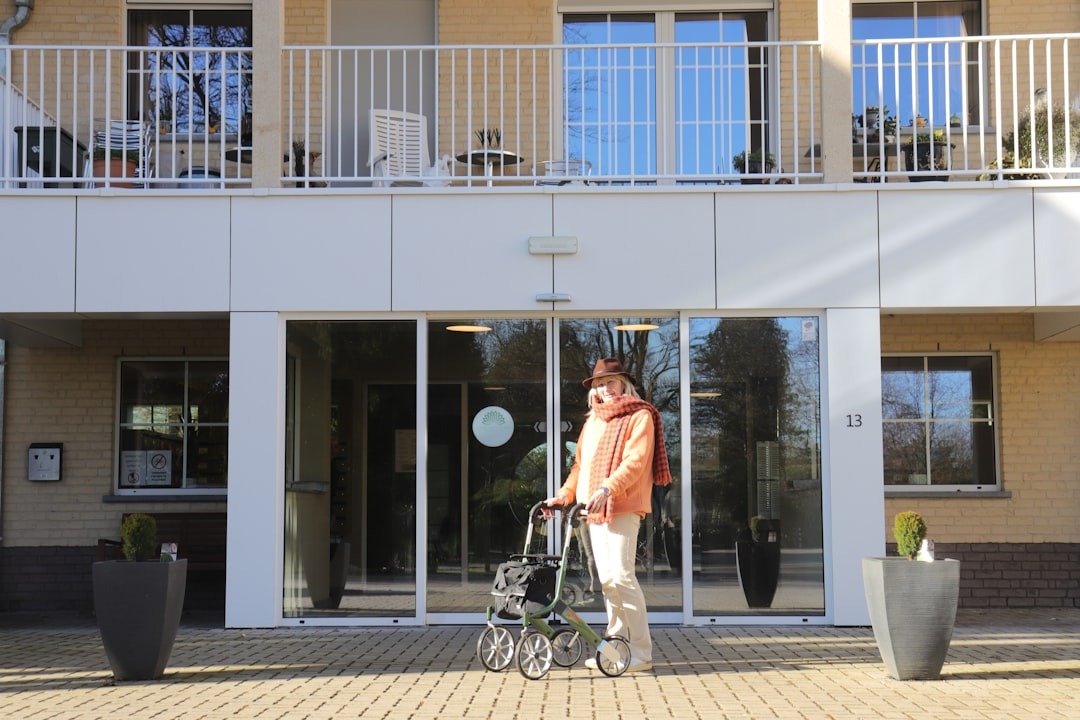
The first DOJ priority is to make sure individuals with disabilities can physically enter the facility as independently as possible; “getting through the door” means providing physical access from public sidewalks and public transportation, per the ADA Checklist for Existing Facilities.
At each entrance, measure for:
- A minimum clear opening width of 32 inches when the door is open 90 degrees, hardware that is operable with one hand without tight grasping or pinching, and a maximum opening force of 5 pounds for interior doors, according to the ADA Accessible Route Requirements guide.
- A level landing on both sides of the door
- No threshold lips or lips exceeding the allowed change in level
Step 3: Inspect the Interior, Corridors, Restrooms, and Service Areas
Interior Circulation and Signage
Once inside, the inspection moves to interior routes and wayfinding. People with disabilities may have substantial difficulty participating in their community because of entrances, stairs, elevators, unclear signage, and rural characteristics. Each of those elements is something you can physically measure and record.
Walk every public corridor and check:
- Minimum 36-inch clear width maintained throughout, free of protruding objects
- Elevator controls at reachable height (no higher than 48 inches for a forward approach)
- Auditory and visual signage as a mandatory feature for clear navigation, ensuring individuals with different disabilities can navigate public spaces effectively, per Know the ADA.
- Signage mounted at the correct height with high-contrast characters
Pro tip: Walk the interior route with a standard wheelchair if one is available. You will immediately feel surface irregularities, detect tight turns, and notice protruding objects at head height that a standing observer routinely misses.
Restrooms
Restrooms tend to generate more individual barrier findings than any other single area in a public facility. Restrooms often contain ADA violations simply because they have so many different features and dimensions to comply with; a single restroom can have dozens of accessibility barriers that may not be easily identified by a layman, per ProactiveAccess.
Check inside each accessible restroom stall for:
- The presence of grab bars, sink height at an appropriate level, and adequate space for wheelchair users. The lack of any of these prohibits people with disabilities from accessing the restroom, per Accessibe.
- Turning radius: a minimum 60-inch diameter clear floor space
- Door hardware operable without tight grasping
- Mirror mounted low enough for a seated user
- Toilet seat height between 17 and 19 inches above the floor
Some of the most common problems people with disabilities report in real-life building access experiences include bathrooms that lack wide doorways and grab bars, with respondents describing needing to leave locations because bathrooms lacked space for incontinence care, or falling because grab bars were not present near a low toilet seat, per the UNM cross-sectional survey of public building accessibility. These are the consequences of unfound barriers, so use those accounts to motivate a thorough restroom inspection.
Service Counters and Goods Access
Once inside, people with disabilities need access to the business’s services, including the front desk or checkout, aisles, and any retail displays, per the ADA Checklist for Existing Facilities. Measure service counter heights, accessible counters must be no higher than 36 inches. Verify that at least one section of every fixed counter meets that threshold.
Step 4: Document, Categorize, and Prioritize Every Finding
How to Record Your Findings
The goal of the survey process is to plan how to make an existing facility more usable for people with disabilities. The Department of Justice recommends developing an Implementation Plan that specifies what improvements will be made to remove barriers and when each solution will be carried out, as the DOJ has stated this plan “could serve as evidence of a good faith effort to comply,” per the DC Office of Disability Rights checklist.
For every barrier found, record:
- Location (zone, room, or GPS coordinate)
- A photograph taken the same day
- The specific standard violated and the dimension measured
- An initial severity rating (prevents access entirely, significantly limits access, or partially limits access)
Document every finding and every corrective action with date, responsible party, and target completion. This documentation constitutes evidence of good faith compliance under DOJ guidelines, per OxMaint’s ADA compliance guide.
Applying the Four-Priority Sequence
Consistent with Department of Justice guidance, corrections generally follow four ascending priorities: accessible entrance, access to goods and services, accessible restroom, and finally any remaining barriers, per Rimkus’s ADA Standards guide. Apply that same sequence to your findings list to determine which repairs deserve immediate resources and which can be scheduled for a later budget cycle.
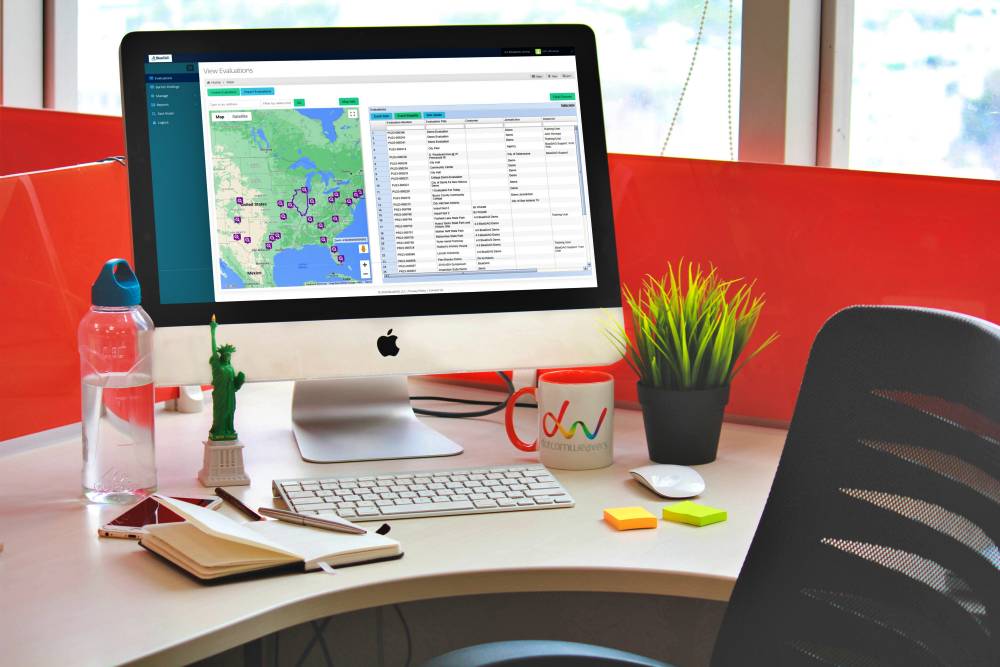
Pro tip: Tools like BlueDAG's Inspection Suite are designed to centralize barrier findings, assign priority levels, and generate the implementation plans that the DOJ recommends as evidence of good faith compliance, replacing disconnected spreadsheets with a single auditable record.
Step 5: Turn Findings Into an Action Plan
Distinguishing Readily Achievable from Structural Changes
For existing facilities, the law requires removal of barriers when doing so is “readily achievable,” meaning easily accomplishable without significant difficulty or cost, per the Rimkus ADA Standards for Accessible Design Guide 2026. This matters because it shapes how you sequence fixes. Re-striping a parking lot, installing a lever handle, or repositioning furniture does not require a building permit. Widening a structural doorway does.
Because removing common barriers can be simple and inexpensive in some cases and difficult and costly in others, the ADA provides a flexible approach to compliance, requiring that barriers be removed in existing facilities only when readily achievable, per the Northwest ADA Center. Start with the low-cost, high-visibility fixes. They serve the most people immediately and demonstrate good faith.
Annual Review Cycle
There is no federally mandated inspection frequency, but best practice in facility management is an annual comprehensive inspection of all six inspection areas, with quarterly checks of high-traffic areas such as accessible parking, primary entrances, and restrooms, per OxMaint’s ADA compliance guidelines. Build those dates into your facility calendar now, before the next complaint arrives.
Common Mistakes to Avoid
- Relying on visual observation alone without using a tape measure or slope gauge; many non-compliant dimensions look fine to the eye
- Treating the checklist as a pass/fail test rather than a planning tool for continuous improvement
- Failing to include people with disabilities in the review process. Engaging representatives from the disability community in the planning and implementation process is a key step recommended by ADA Title III guidance at Know-the-ADA.
- Assuming that because a building was recently constructed it is automatically compliant, construction errors are common, and standards are periodically updated
- Letting documentation lapse: an undocumented corrective action is legally equivalent to no action at all
Frequently Asked Questions
What is the difference between an accessibility audit and a self-evaluation?
A self-evaluation is a broad review of a facility’s policies, programs, and physical features, typically required of government entities under Title II. An accessibility audit, sometimes called a barrier survey or CASp inspection, focuses specifically on physical features measured against the 2010 ADA Standards. The 2010 ADA Standards for Accessible Design are the U.S. federal requirements for physical accessibility in public accommodations and government facilities. Enforced by the Department of Justice, the standard defines strict dimensional thresholds for parking, routes, doors, and restrooms, per Geocadra’s ADA compliance audit guide. A formal audit produces a defensible written record; a self-evaluation is a useful starting point for planning.
Do older buildings have to meet accessibility requirements?
Yes. The Americans with Disabilities Act is a civil rights law that applies to your facility today, regardless of when it was built, per OxMaint’s ADA Accessibility Compliance guide. The key standard for existing facilities is whether barrier removal is “readily achievable.” Older buildings are not exempt; they simply have more flexibility in how quickly they phase in structural changes.
How many accessible parking spaces does a public facility need?
The required number scales with the total lot size. For example, a lot with 1 to 25 total spaces must provide 1 accessible space, and the ratio increases with lot size. Van-accessible spaces have additional dimensional requirements that standard accessible spaces do not meet, per OxMaint’s ADA compliance guide for building facilities. Check the 2010 ADA Standards, Table 208.2 for the full count matrix.
What should an accessible route measure?
An accessible route must be a continuous, unobstructed path at least 36 inches wide with a maximum slope of 1:12, per the eAuditor ADA Checklist for existing facilities. Cross slope, the tilt from side to side, must not exceed 1:48. Any surface that is unstable, slippery, or has abrupt changes in level greater than half an inch is a barrier, regardless of width.
How often should a facility re-inspect for accessibility barriers?
Removing barriers is an ongoing responsibility, and facilities should re-evaluate barriers every year to determine which ones to remove, per the DOJ’s archived ADA guidance for businesses. High-traffic areas such as parking lots, main entrances, and restrooms warrant a lighter check every quarter, since surface conditions and furniture arrangements change frequently.
Conclusion
Identifying accessibility barriers across public facilities follows a clear, repeatable process: prepare your tools and documents, inspect the exterior from parking through the entrance, move through the interior systematically, document every finding the same day, and apply the four-priority sequence to plan your remediation. Non-compliance with ADA standards can result in significant legal and financial consequences. Entities found in violation may face lawsuits, fines, and requirements to undertake remedial actions, per Know the ADA. Beyond legal risk, every identified and removed barrier directly improves someone’s ability to participate in community life.
If your team manages barrier identification and remediation across multiple facilities, BlueDAG’s accessibility compliance platform provides a centralized system for capturing findings, tracking corrective actions, and building the implementation plans regulators expect. Start with the walkthrough steps in this guide, then use purpose-built software to keep your records defensible and your progress visible.
Disclaimer: This article is provided for general informational and educational purposes only and is not intended to constitute legal advice or a legal opinion. While reasonable efforts have been made to provide accurate and current information, laws, regulations, standards, guidance, and interpretations may change, and no representation or warranty is made regarding the accuracy, completeness, or applicability of the information provided. References to tools, resources, or compliance approaches are for informational purposes only and do not guarantee compliance with the Americans with Disabilities Act (ADA) or any other applicable law or regulation. Readers should consult qualified legal counsel or other appropriate professionals regarding their specific circumstances. BlueDAG assumes no liability for any errors or omissions or for actions taken or not taken in reliance on the information contained in this article.
Sources
- CDC Disability and Health Data System, Centers for Disease Control and Prevention. Over 70 million U.S. adults reported having a disability in 2022. More than 1 in 4, over 70 million
- Disability in the U.S. Share of Population 2024, USAFacts. 13.7% of the U.S. population had a disability in 2024, the highest share recorded. https://usafacts.org/answers/how-many-people-have-a-disability/country/united-states/
- Accessibility of Public Buildings in the United States: a Cross-Sectional Survey, Disability and Rehabilitation / Taylor and Francis. Survey of barriers encountered by people with disabilities in public buildings. Despite existing revised
- Disability Statistics in the U.S.: Key Data on Prevalence, Types, and Accessibility, AudioEye. Analysis of CDC disability prevalence data. The scale of disability prevalence
- ADA Checklists for Existing Facilities, New England ADA Center. Checklist based on 2010 ADA Standards for conducting accessibility surveys. https://adachecklist.org/
- ADA Standards for Accessible Design Compliance Guide 2026, Rimkus. Four-phase roadmap for ADA compliance following DOJ 2010 Standards. https://rimkus.com/article/ada-standards-accessible-design-compliance-guide/
- ADA Accessibility Compliance for Building Facilities, OxMaint. Inspection covering parking, entrances, corridors, restrooms, signage, and elevators. https://oxmaint.com/industries/facility-management/ada-accessibility-compliance-building-facilities
- U.S. Access Board, Buildings and Sites, U.S. Access Board. Overview of ADA and ABA accessibility standards for buildings and facilities. https://www.access-board.gov/buildings.html
- Checklist for Existing Facilities, ADA-Compliance.com. Four-priority framework for readily achievable barrier removal. http://www.ada-compliance.com/ada-compliance/checklist-for-existing-facilities
- Top ADA Violations, ProactiveAccess. Common physical accessibility violations including parking, entrances, and restrooms. https://www.proactiveaccess.com/ada-violations
- ADA Accessible Route Requirements: Complete Inspector Guide, All Things Inspector. Technical breakdown of accessible route width, slope, and surface requirements. Compliant parking spaces
- eAuditor ADA Checklist for Existing Facilities, eAuditor. Digital inspection methodology covering entrances, parking, interior routes, and restrooms. Before conducting the inspection
- Cities and Counties, First Step Toward Solving Common ADA Problems, ADA.gov (archived). Common parking, route, and restroom barriers in city and county facilities. https://archive.ada.gov/civiccommonprobs.htm
- Appendix, ADA Checklist for Existing Conference and Meeting Facilities, DC Office of Disability Rights. DOJ recommendation on developing an implementation plan for barrier removal. https://odr.dc.gov/book/appendix-checklist
- ADA/ADAAG Accessibility Compliance Audit Guide, Geocadra. Dimensional thresholds and priority-based barrier removal system. https://www.geocadra.com/en/standards/ada-accessibility
- A Scoping Review of Public Building Accessibility, ScienceDirect. Review of accessibility research identifying parking, entrances, and restrooms as the most frequently studied barriers. Environmental features addressed
- Removing Barriers in Buildings, Lesson 4, ADA.gov (archived). DOJ guidance on the four-priority sequence for barrier removal in existing facilities. The ADA recommends a four-priority sequence for barrier removal in existing facilities: Priority 1, Accessible approach and entrance, Priority 2, Access to goods and services, Priority 3, Access to public toilet rooms, Priority 4, Access to other items such as water fountains and telephones.
- Understanding Architectural Barriers in ADA Title III, Know-the-ADA. Steps for conducting accessibility audits and engaging stakeholders. https://know-the-ada.com/understanding-architectural-barriers-in-ada-title-iii/